What is MCP?
Model Context Protocol (MCP) enables Cursor to connect to external tools and data sources.Why use MCP?
MCP connects Cursor to external systems and data. Instead of explaining your project structure repeatedly, integrate directly with your tools. Write MCP servers in any language that can print tostdout or serve an HTTP endpoint - Python, JavaScript, Go, etc.
How it works
MCP servers expose capabilities through the protocol, connecting Cursor to external tools or data sources. Cursor supports three transport methods:| Transport | Execution environment | Deployment | Users | Input | Auth |
|---|---|---|---|---|---|
stdio | Local | Cursor manages | Single user | Shell command | Manual |
SSE | Local/Remote | Deploy as server | Multiple users | URL to an SSE endpoint | OAuth |
Streamable HTTP | Local/Remote | Deploy as server | Multiple users | URL to an HTTP endpoint | OAuth |
Protocol support
Cursor supports these MCP protocol capabilities:| Feature | Support | Description |
|---|---|---|
| Tools | Supported | Functions for the AI model to execute |
| Prompts | Supported | Templated messages and workflows for users |
| Roots | Supported | Server-initiated inquiries into uri or filesystem boundaries to operate in |
| Elicitation | Supported | Server-initiated requests for additional information from users |
Installing MCP servers
One-click installation
Install MCP servers from our collection and authenticate with OAuth.Using mcp.json
Configure custom MCP servers with a JSON file:
Using the Extension API
For programmatic MCP server registration, Cursor provides an extension API that allows dynamic configuration without modifyingmcp.json files. This is particularly useful for enterprise environments and automated setup workflows.
MCP Extension API Reference
Learn how to register MCP servers programmatically using
vscode.cursor.mcp.registerServer()Configuration locations
Project Configuration
Create
.cursor/mcp.json in your project for project-specific tools.Global Configuration
Create
~/.cursor/mcp.json in your home directory for tools available everywhere.Authentication
MCP servers use environment variables for authentication. Pass API keys and tokens through the config. Cursor supports OAuth for servers that require it.Using MCP in chat
The Composer Agent automatically uses MCP tools listed underAvailable Tools when relevant. Ask for a specific tool by name or describe what you need. Enable or disable tools from settings.
Toggling tools
Enable or disable MCP tools directly from the chat interface. Click a tool name in the tools list to toggle it. Disabled tools won’t be loaded into context or available to Agent.Tool approval
Agent asks for approval before using MCP tools by default. Click the arrow next to the tool name to see arguments.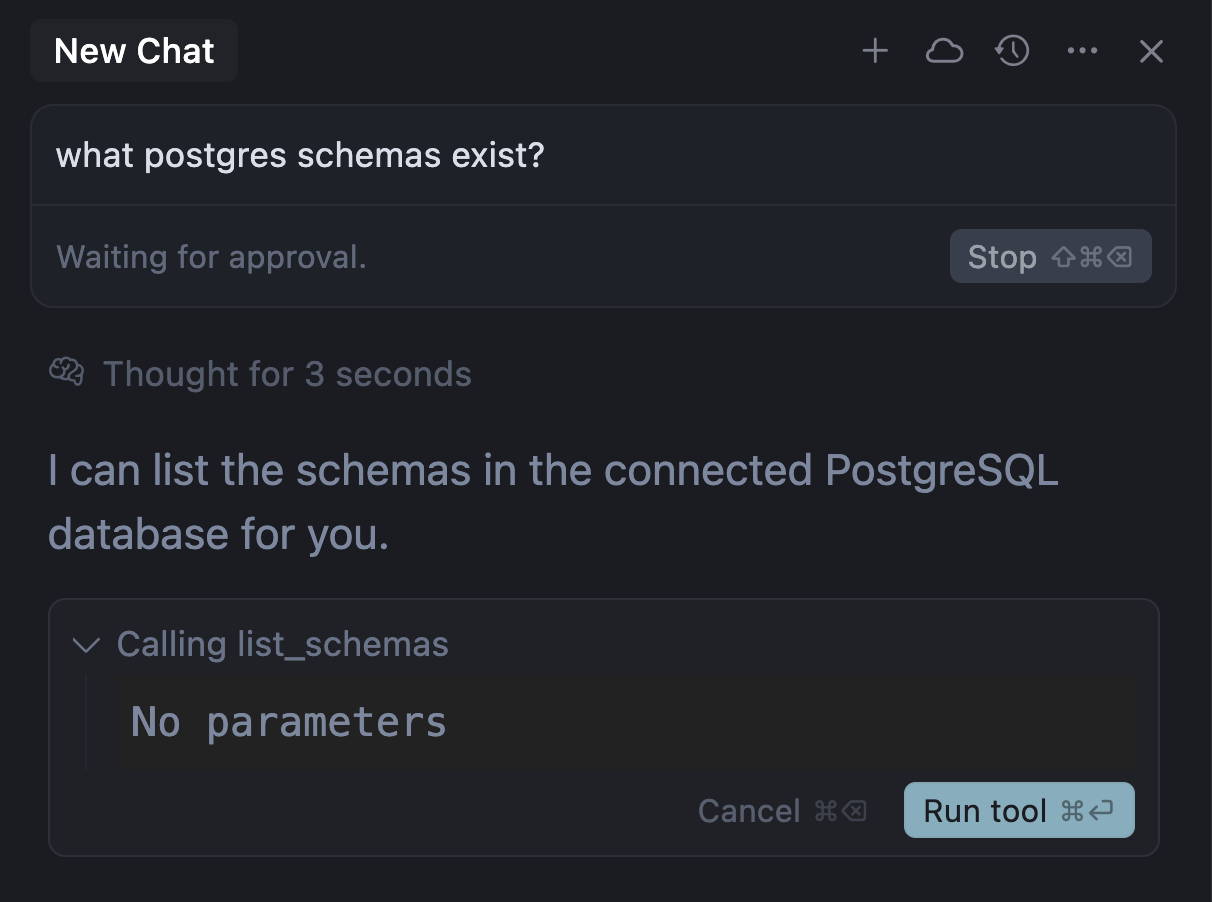
Auto-run
Enable auto-run for Agent to use MCP tools without asking. Works like terminal commands. Read more about Yolo mode here.Tool response
Cursor shows the response in chat with expandable views of arguments and responses: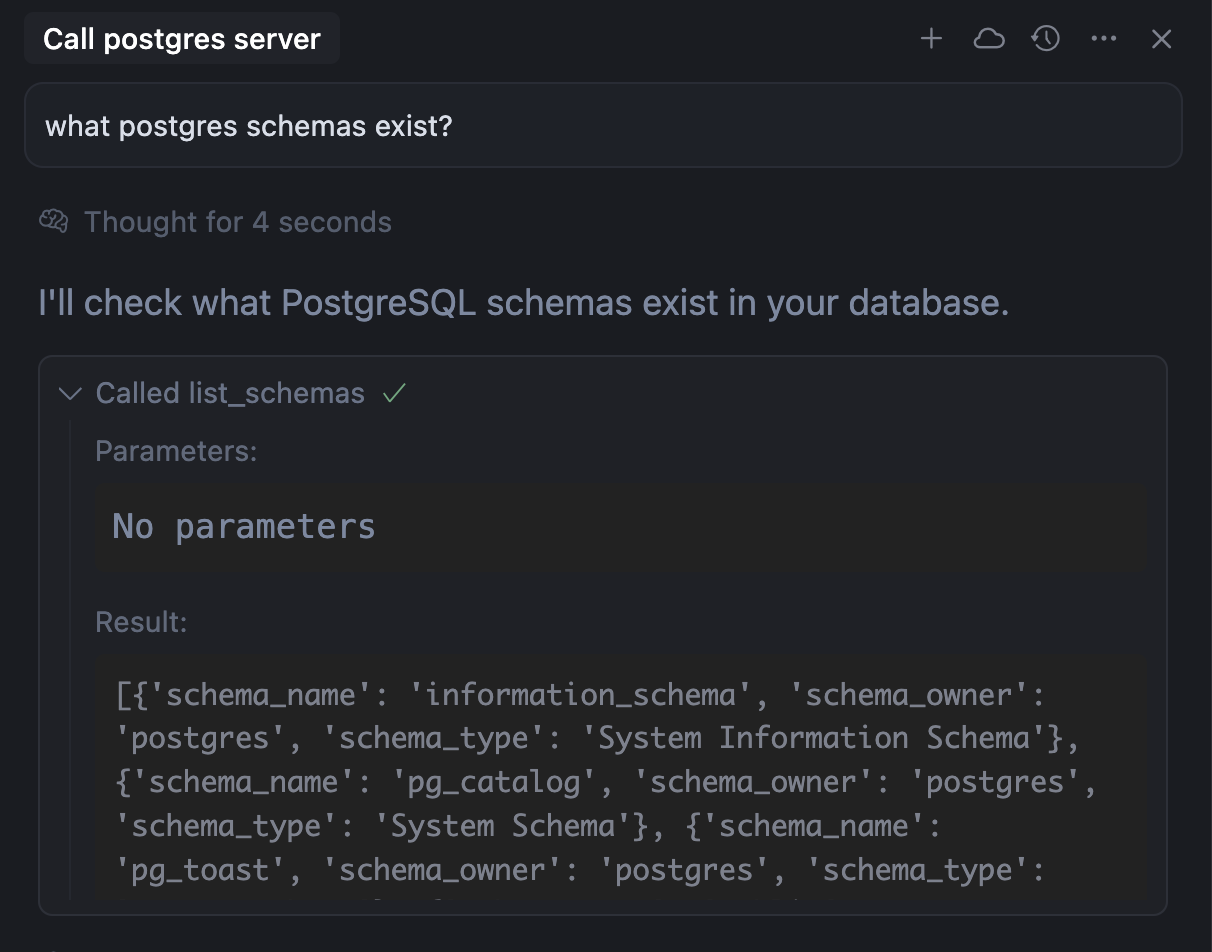
Images as context
MCP servers can return images - screenshots, diagrams, etc. Return them as base64 encoded strings:Security considerations
When installing MCP servers, consider these security practices:- Verify the source: Only install MCP servers from trusted developers and repositories
- Review permissions: Check what data and APIs the server will access
- Limit API keys: Use restricted API keys with minimal required permissions
- Audit code: For critical integrations, review the server’s source code
Real-world examples
For practical examples of MCP in action, see our Web Development guide which demonstrates integrating Linear, Figma, and browser tools into your development workflow.FAQ
What's the point of MCP servers?
What's the point of MCP servers?
MCP servers connect Cursor to external tools like Google Drive, Notion, and
other services to bring docs and requirements into your coding workflow.
How do I debug MCP server issues?
How do I debug MCP server issues?
View MCP logs by: 1. Open the Output panel in Cursor (Ctrl+Shift+U)
2. Select “MCP Logs” from the dropdown 3. Check for connection errors,
authentication issues, or server crashes The logs show server initialization,
tool calls, and error messages.
Can I temporarily disable an MCP server?
Can I temporarily disable an MCP server?
Yes! Toggle servers on/off without removing them: 1. Open Settings (
Ctrl+Shift+J) 2. Go to Features → Model Context Protocol 3. Click
the toggle next to any server to enable/disable Disabled servers won’t load or
appear in chat. This is useful for troubleshooting or reducing tool clutter.
What happens if an MCP server crashes or times out?
What happens if an MCP server crashes or times out?
If an MCP server fails: - Cursor shows an error message in chat - The tool
call is marked as failed - You can retry the operation or check logs for
details - Other MCP servers continue working normally Cursor isolates server
failures to prevent one server from affecting others.
How do I update an MCP server?
How do I update an MCP server?
For npm-based servers: 1. Remove the server from settings 2. Clear npm cache:
npm cache clean --force 3. Re-add the server to get the latest version For
custom servers, update your local files and restart Cursor.Can I use MCP servers with sensitive data?
Can I use MCP servers with sensitive data?
Yes, but follow security best practices: - Use environment variables for
secrets, never hardcode them - Run sensitive servers locally with
stdio
transport - Limit API key permissions to minimum required - Review server
code before connecting to sensitive systems - Consider running servers in
isolated environments